
Hi Everyone - Today I wanted to pop in and share how I photograph my cards, including my inexpensive set up. When I first went on my mission to improve my card photography, information was hard to come by, and not many bloggers seemed to be blogging on the subject. So after many trials and errors, I've landed on two main set ups that I alternate depending on the project.
Todays post focuses on stand up cards. Later this week we will look at how I photograph flat laying cards.
All of the supplies mentioned can be found at the bottom of the post. And if you have any questions, or better yet, tips on better settings / equipment - please leave those in the comments below.
Please note, this is the method(s) I use and like. This doesn't mean they are by any means correct or the best. I am not a professional photographer and have very limited education on the subject. This is what works for me.
My Cameras

The first thing you of course need is a camera. My camera of preference is a DSLR, but this is also an investment. I paid around $600 for my Nikon D3200 probably 5-6 years ago BUT I do a lot of photo taking aside from cards and I refuse to use a cell phone for photos. This camera has since been updated to the D3500. I know a lot of people do and it works fine for them, but I am a photo snob and want my memories preserved as best as in as highest qualify as possible, but I will share some phone photography options as well. My most used lenses for card photography are the two that came with it which are a standard lens 18-55mm, and a basic telephoto lens 55-200mm. You can now get this camera much cheaper than I with better lenses on amazon as there are now newer models.

My second camera of choice is a point and shoot. I've used the panasonic lumix brand for as long as I can remember. I choose this brand because they have excellent optical zoom. The main function of this camera in my arsenal is to take photos at concerts, where I don't want to drag my DSLR. I also use this to do my card close ups and process photos, but it could be used for main card photos as well, and I'll show some examples of that later on. The model I have is the ZS60, chosen for its slim design that can fit in my pocket. They do have cameras that close resemble a DSLR without the detachable lenses, but I've never tried them.
Natural Light
Photographing with natural light is said to be the best. If you're like me, those opportunities are hard to come by. If/When I can go outside to photograph my cards, I take my background outside with me and place it and my project on the deck (or ground). I stand above it hovering the camera directly overtop about 6-12 inches above the card.
The Foldio Method

The foldio was one of the first accessories I purchased to photograph cards. It's much cheaper now than it was when I bought it, and it works great! The foldio is a 10 inch foldable light box with built in LED lights and a white surrounding that bounces light through all angels of your subject. The foldio is ideal if you want to photograph cards that are standing up OR for cards that have glitter this is usually my preferred method. There have since been a foldio 2 and foldio 3 with more advanced features, and of course a higher price tag. You can now get the original foldio that I use for only $30!

When I photograph with my foldio I use a piece of scrapbooking paper with a simple design for the background, and my DIY photo board for my base (more on that later). I usual a fake flower or other prop in the background, and set my card up closer to the front, on a slight angle. This will help blur the background, keep the card in focus, and show dimension.
I usually stand back about 5-10 feet from the card and zoom into it, typically using a telephoto lens on my DSLR Camera.
However as of recently I've been liking the look more if my camera is closer, 4-5 feet using my standard kit lens (18-55mm) My camera is usually on a tripod for stability as I'm going to shoot in manual mode with a slower shutter speed to allow more light in. I also usually use a remote to trigger my shutter vs pressing the shutter release button, so there is no camera shake. And my camera is at the same height, directly level with the card.
However as of recently I've been liking the look more if my camera is closer, 4-5 feet using my standard kit lens (18-55mm) My camera is usually on a tripod for stability as I'm going to shoot in manual mode with a slower shutter speed to allow more light in. I also usually use a remote to trigger my shutter vs pressing the shutter release button, so there is no camera shake. And my camera is at the same height, directly level with the card.
It is however possible to get good photos without all of these steps. Below I will show you several options using the foldio and various cameras / settings.
Click to enlarge photos. Best viewed on a computer.
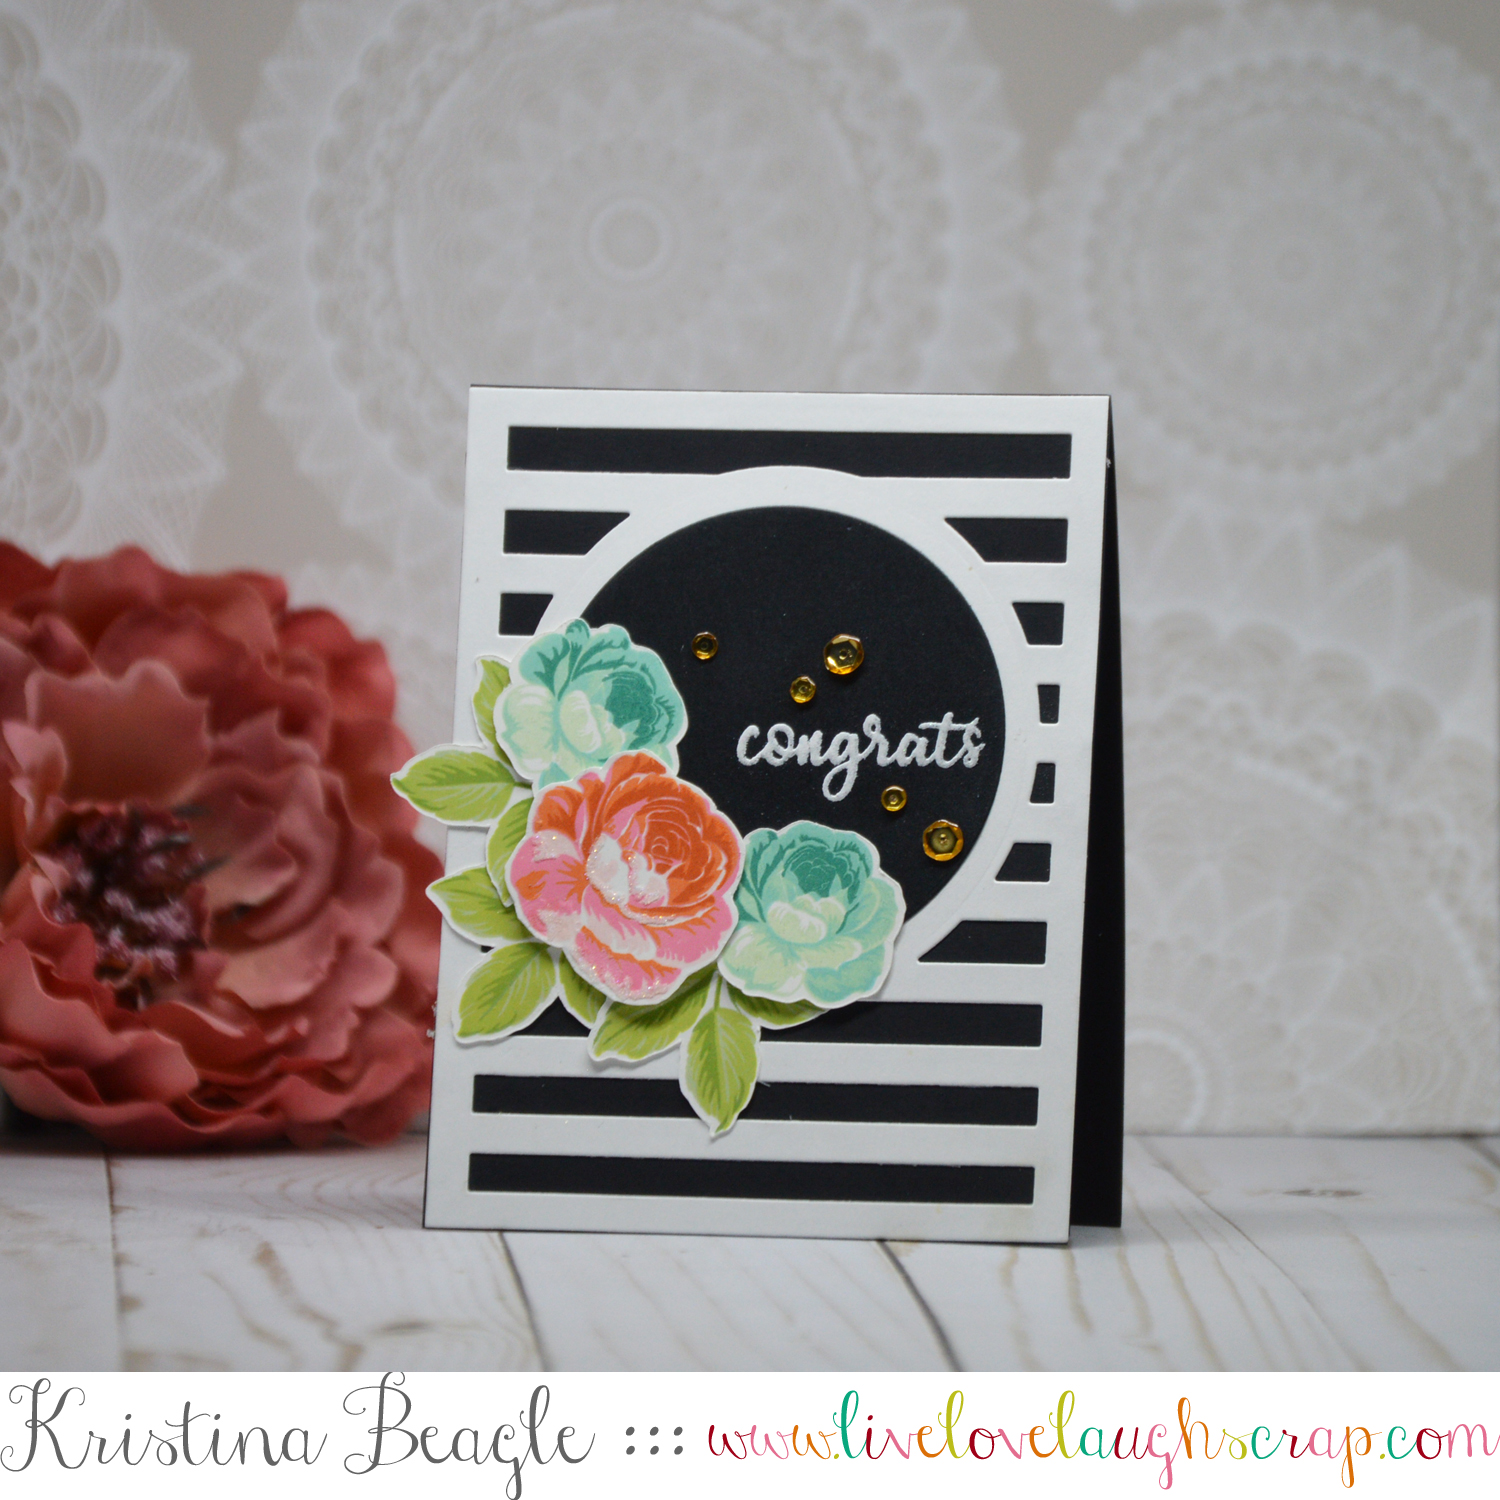
DLSR Camera
 |
| DSLR, Telephoto Lens, On Tripod, Shutter 1/50, F6.3, ISO 200, No Flash |
In this photo my camera is on a tripod with my 55-200mm telephoto about 10 feet away from the card zoomed in, my lens was at the 135mm mark, with the camera at at the same height as the card. I have my backdrop and props in place and the card is on a slight angle to give it more interest. My camera is on Manual Mode set to an ISO of 200, Aperture of f6.3 and a shutter speed of 1/50th of a second with no flash. I usually take 3 different shutter speeds 1/30 1/50 and 1/70 and choose the best. The surrounding light can/will affect the photo. I've slightly brightened the photo with my photo editor, cropped, and added my watermark.
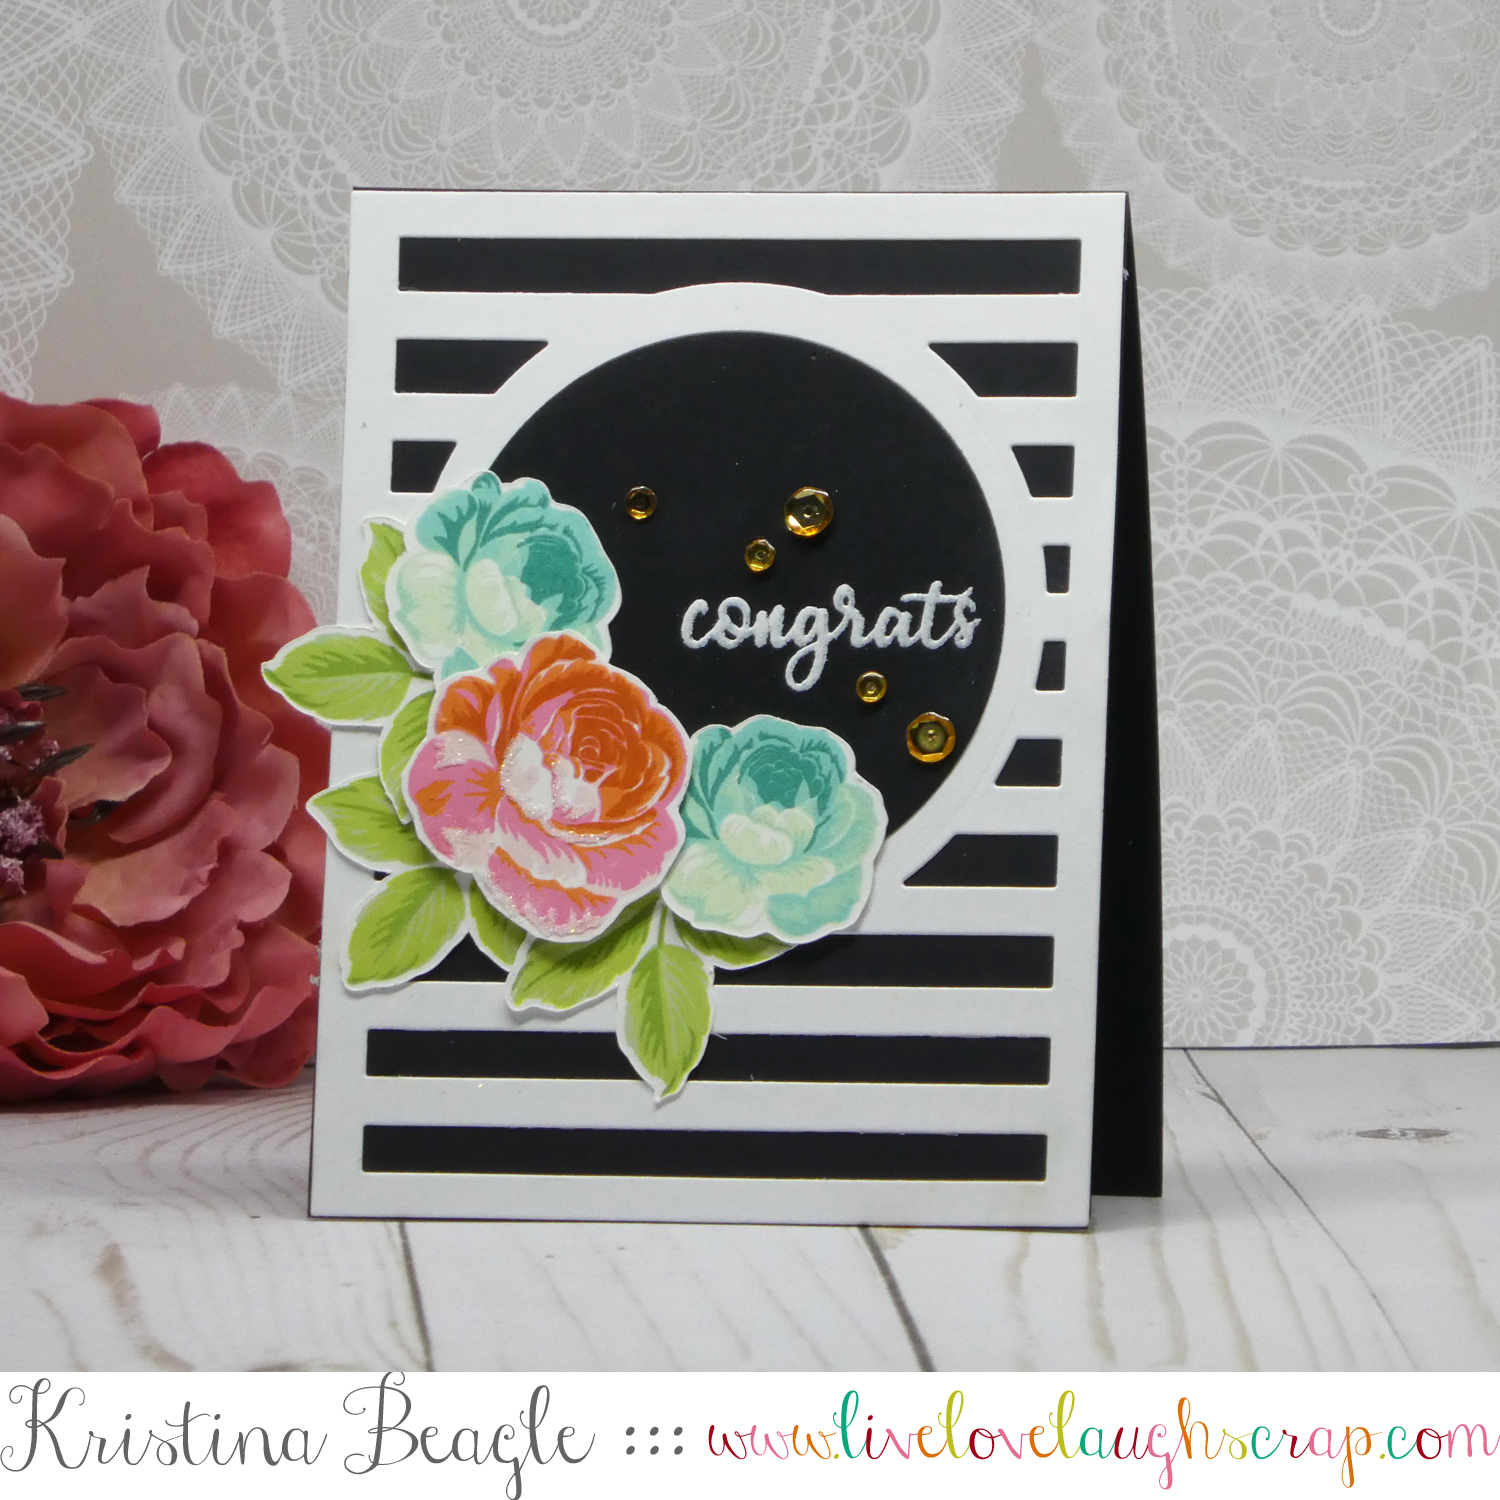
 |
| DSLR Auto Mode with Telephoto Lens |
If you don't have a tripod and/or don't want to fool with manual mode. This photo was shot with my DSLR in Auto Mode no tripod. I stood about 10 feet away and zoomed in. No Flash. I've slightly brightened the photo with my photo editor, cropped, and added my watermark.
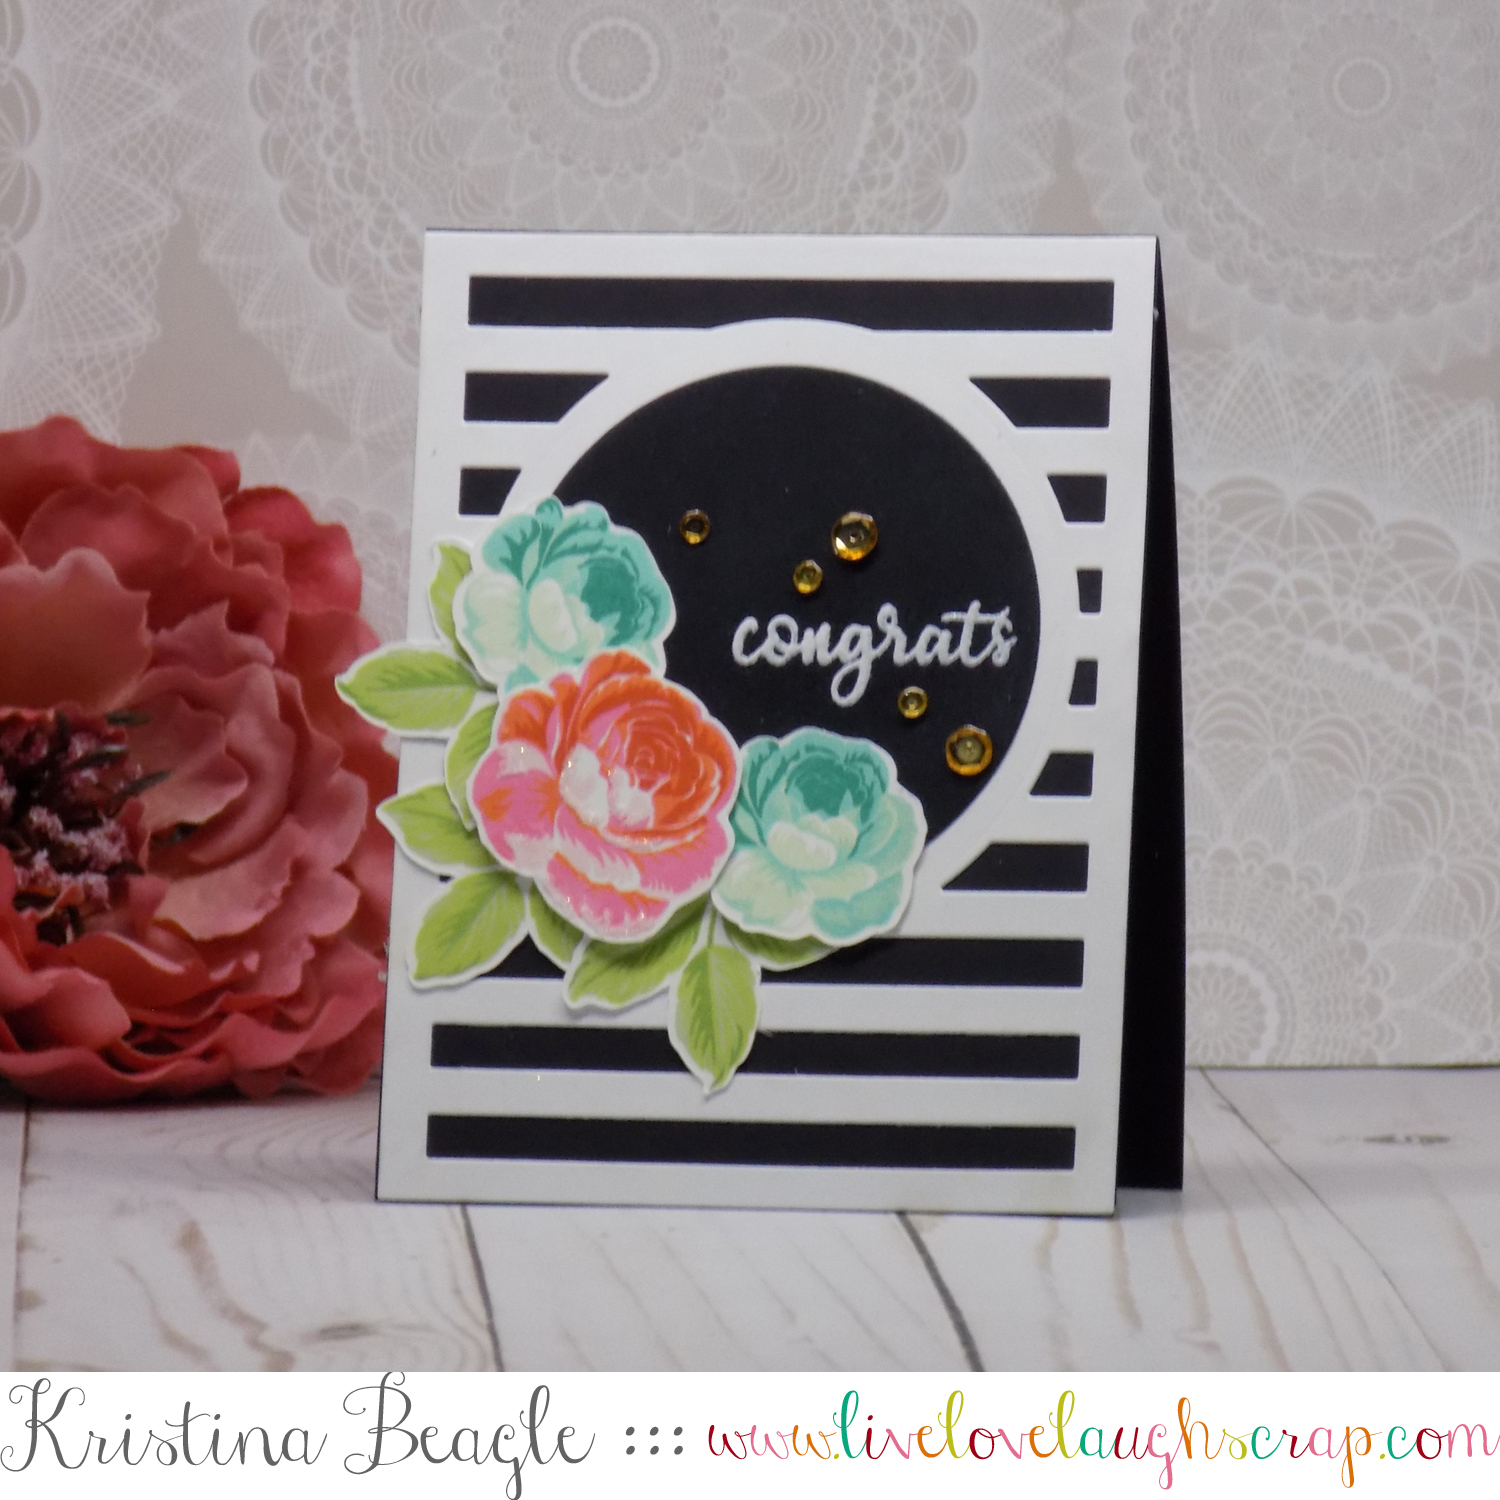
 |
| DSLR with Kit Lens, On Tripod, Shutter 1/30, F 6.3, ISO 200, Flash ON |
If you don't have a telephoto lens lens you can still achieve a good photo with your kit lens and DSLR camera. This photo was taken with my kit lens (18-55mm). I've moved my tripod closer. I'm now about 5 feet away from the card, and my camera settings have changed. Like always I've taken 3 different exposures with and without flash. And the one that looked best ended up being a shutter speed of 1/30th of a second WITH flash (aperture and ISO same, 6.3 and 200). I didn't brighten this one in editing, simply cropped and watermarked.
 |
| DSLR with Kit Lens, No Tripod, Camera on Auto Mode |
And if you don't want to fool with a tripod or manual mode. This is the same photo taken without the tripod and my DSLR camera set to auto mode. I'm standing 5 feet away, zoomed in slightly, no flash. The photo has been brightened slightly, cropped, and watermark added.
Point and Shoot Camera
 |
| Panasonic Lumix ZS60, Auto Mode, No Flash |
This photo was taken with my point and shoot on auto mode, force flash off. As you can see, it's really not that much different ( and much less set up and hassle). No tripod. I'm standing about 10 feet back and zooming in. I slightly brightened the photo, cropped, and added my watermark. The only real difference is in the background. You don't get the blurred background and field depth you do with a point and shoot. You may lose a small amount of detail, but it's negligible.
Many point and shoots including the one I use do now have manual settings. I've played with them a little and don't like them. Shooting manual using the same settings on my P&S and DSLR does not yield anywhere near the same results. This could of course vary camera to camera. When I find something I like I stay pretty brand specific. I've exclusively used Panasonic Lumix point and shoots for the last 7 years. I only upgraded once and it was my own fault because I lightly dropped my old one and scratched the lens (it actually still worked great I gifted it to someone). I've played with other cameras and I just don't like anything else. But for reference lets try my moms camera:
 |
| Nikon Coolpix L340, Auto Mode, With Flash |
I personally loathe this camera. We both bought one on Black Friday for $100. It only performs well under natural light and has horrible camera shake and no image stabilization. She however makes it work and likes it. Notice it seems there is a blur and loss of clarity. But this still isn't a horrible photo.
Phone
If you have no other choice but to use a phone then you can make it work, but it is definitely my least preferred method for any type of photography. It is physically incapable of capturing the depth an actual camera can. I'm not good at explaining it, but if you're curious there a good article here.
This is the best I could do with my phone and my foldio:

Is this horrible? No. Is it as pleasing to the eye as the others, no.
I was not able to stand back and zoom in like the others so you lose your background, which may seem negligible, but it helps your eye focus on the subject, vs having it right in your face.
So I had to get close AND use a flash to attempt to get a semi decent photo.
You'll also notice significant color loss. The colors are not as bright and vibrant as they are in the other photos, or in real life.
The only advantage I see is that my stamped images have much more detail, likely because the camera is so close + the use of flash.
Staging
Leave some space. It's more pleasing to the eye when you're showing a scene that includes a great card, instead of just a card, which can be more overwhelming for you eye to focus on. It helps the dimension and size of the card and its elements look more realistic.


Try bonus close ups to capture those details instead. And try using a flash to capture glitter, shimmer, and shine. Shimmer, such as wink of stella, can be very tricky to capture. The best way I've found is to use my flash, but I still don't have it down to a science.

Props
Just like leaving space, adding props also helps make your whole image more pleasing to the eye.
For my background I typically use scrapbooking paper. Whenever it's on sale at Michaels or Joann Stores I grab some simple neutrals to use as backgrounds. I tape them to the back of the foldio.
For the "floor" of the card I have made some DIY photo boards out of decorative poster board you can also find at the craft store. We R Memory Keepers has some great one. I typically use the same We R Memory Keepers white wood poster I found at Hobby Lobby, which I've glued down to some cardboard for extra stability. For lighter / white cards, a slightly darker background can help with contract.
Faux Florals are one of the simplest props. I grab them when they're on sale/clearance at the craft store.
And there ya have it! Be sure to stop by tomorrow for Part 2 - How I photograph my flat lay cards! And if you have any questions - Or tips on how you think I can improve, I'd love to hear em. Leave me a note in the comments below.
As I said before I am by no means an expert, and am still envious of many other crafters and their beautiful photos. I nit pick my photos every time I take them and am constantly trying to improve. What works for me may not work for everyone.
Equipment
 The Original Foldia Where to buy: AMZ |
 Sunpak Platinum Plus Tripod Where to buy: AMZ |
 Nikon D3500 DSLR Where to buy: AMZ |
 Nikon D3500 DSLR Bundle Where to buy: AMZ |
 Panasonic Lumix ZS60 Where to buy: AMZ |
 Wireless Shutter Release Remote Where to buy: AMZ |
GIVEAWAY
Want a foldio of your own? Good, Cause I want to sent one to one of you! Simply sign up & follow the promps using the Rafflecopter giveaway below to enter!
PS: Following just to unfollow later is uncool, only entry if you truly want to be here, unfollowers will be excluded from future giveaways.
PS: Following just to unfollow later is uncool, only entry if you truly want to be here, unfollowers will be excluded from future giveaways.
No comments:
Post a Comment