
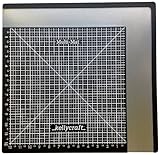
I'm here today with a fun foiling project using my
Get-it-Straight™ Laser Square.
I love the look of foiling and don’t do it as much as I’d like, but was
inspired by a video Jennifer McGuire recently posted using tape to do foiling!
I didn’t have the Be Creative tape so I just cut the full
size sheets into little ¼” strips.
Here’s what I did;
1- Starting with an a2 sized card base I set a line with my
Get-it-Straight™ Laser Square
½” off the top of the cardstock
½” off the top of the cardstock
2- Remove the release paper from one side of the tape strip
and adhere using the laser
Line as a guide

3- Next, repeat this process ½” off the bottom of the
card stock, you will now how two
tape strips adhered on each side of the card
tape strips adhered on each side of the card
4- Using a bone folder, rub the tape down firmly, then
remove the release paper
5- Now, adhere small strips of foil to the exposed tape and rub lightly with your bone
rub on lightly with your bone folder, you will not have two perfectly straight & foiled
5- Now, adhere small strips of foil to the exposed tape and rub lightly with your bone
rub on lightly with your bone folder, you will not have two perfectly straight & foiled
Strips!
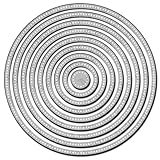
6- I went on to finish my card by adhering a 3” white layer
between the two foiled strips,
followed by a circle to spotlight a colored image and sentiment.
followed by a circle to spotlight a colored image and sentiment.


Oh, this is too cute!
ReplyDeleteAwwww - this is so sweet! Love the addition of those teensy sequins.
ReplyDeleteCool and awesome looking card - so very cute!!
ReplyDelete